
Remember the mailbox I found at a flea market in San Francisco last weekend?
Well, with a very small amount of elbow grease and a can of spray paint, it has transformed into something so cute, that I can hardly even stand it.
If you didn't click on the link above, I must show you what it looked like before. I mean seriously--I can't believe what a difference a can of spray paint makes.
I'm making an insert for the bottom with our new married name and am having cards printed for our guests to fill out and drop into our mail slot.
Our goal is for them to have fun answering the pre-printed questions. We can't wait to read them all on our long flight from the east coast back to the west coast!
My fiance had the great idea of attaching the mailbox to a wood stump to carry on the theme from our centerpieces. It's great that he is involved in our wedding plans, we're both so excited to see how it all turns out.
Monday, April 25, 2011
Our mailbox guestbook is complete!
Monday, April 18, 2011
Flea Market Find!
I was so excited to stumble across this vintage mailbox at the Candlestick Park Flea Market this past weekend. After some quick haggling, it was mine!
I am going to clean it up and put a coat of red spray paint on it to sit on one of our entry tables. I am not quite sure what I will do for an actual guest book, or if we will even do one for that matter--but I plan on making good use of this mailbox by creating some small cards for our guests to write us messages.
And who knows, perhaps we'll even get to stick it on the front of our house one day. I've always wanted a red mailbox!
Sunday, April 17, 2011
DIY Painted Mason Jars
Mason jars are all the rage, they're popping up all over my favorite wedding blogs. They're great for centerpieces that hold a mix of blooms, which is why I am looking to use them for our wedding.
I'm always looking for ways to incorporate our wedding colors into different details, so I decided to see what the jars would look like painted. I think that it came out pretty good! I think I'll paint one for every table and maybe mix in clear glass as well. But, the court is still out on that one.
You only need to products to create them. A surface conditioner and some perm-enamel. I got mine at Jo-Ann for about $12 or so.
To do this, it's super easy. First, take of the label and make sure that all the adhesive is off the jar so that it looks nice and clean. Or, you can always buy a case of clean jars. I'm going for the recycle-route and am using random jars from things we already use. Wash the inside and make sure it's good and dry. Save the lids!
Second, you are going to put some of the Surface Conditioner into the jar, put on the lid, and swirl it around and around. You may dump what's left back into the container to use on your other jars. Now, get a cocktail and sit back for an hour or two to be safe and let that solution dry. In the sun--it might dry quicker!
Lastly, pour some Perm-enamel paint into a container with a LITTLE water to dilute the paint. The instructions say that you should not do this---but I did and it worked just fine. If you do not add water, the paint doesn't thin out enough to swirl around the jar. Pour the mixture in the jar and swirl it around and around. I did this in my front yard and I am sure the neighbors thought I was a little crazy. But who cares---because the end result was worth it. Not to mention, it was a nice arm workout to make sure that I'm looking good on September 10!
Let your jars dry and voila!
Friday, April 15, 2011
Centerpiece Ideas
Now that all the "big stuff" is done, it's time to start figuring out the details. This weekend, my focus is on centerpieces and table numbers.
The image below is from Flora Grubb, isn't it beautiful? I already assigned my dad the ask of "stump collecting." I love the mix of jars holding an array of flowers. My mom is planting lots of dahlias and zinnias which we plan on filling the vases with.

I am playing with the idea of painting jars and metal cans (yay for recycling!) to serve as vases. I will post a "how to" on that soon, it's so easy and really adds an extra touch of DIY goodness.

I am loving these table numbers using simple exterior house numbers found at hardware stores.

We are headed to a big flea market this weekend, so we'll see what I come back with! I think that these simple ideas will look great in the 1812 Farm.
Monday, April 4, 2011
April is ready to download!
I'm a few days late, but better late than never...right? It's been beyond crazy around here. Between working on invitations for my June brides and all my wedding crafts AND a full-time job--time slips right through my fingers. I'll be sharing another DIY project with you guys this week, I think you're going to love it.
April's calendar design is derived from my invitation set called, "Tea for Two." I designed this invitation set for Teal and Todd (which makes the name of this invite that much more appropriate!). This invites are one of my newer designs. They provide a nice mix of modern and elegant. Don't you think they look like a hip doily? Or something...
You may buy a sample of this invitation here. 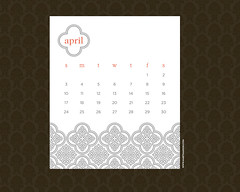
Click on the link below to download your desktop (a new window will open, either drag it to your desktop or right click and "save image as"):
1024 x 768
1280 x 960
1280 x 1024
1600 x 1200
1680 x 1050
1920 x 1200


