
As I was doing some Antique Blue Mason Jar shopping in local antique stores, I came across the most beautiful glass and crystal cake pedestals. I knew instantly that is what I wanted to put our assortment of whoopie pies on at the reception. That was, until I turned one over to see the price. They ranged from $40-$130 each, which was out of my budget considering it would take a few of them to complete our dessert table.
Looking at them, I realized they'd be so easy to make! I hopped in the car and went to a thrift store where I found an assortment of plates and glasses. They ranged from 79¢ to $1.29 each. I bought enough for a couple stands and headed to the hardware store where I bought some Gorilla Glue.
Here are some of the pieces:
Unfortunately, I didn't take photos "in the making." Fortunately, it is ridiculously easy. Simply take the glue and line the edge of your glass (follow the directions on the glue and don't use too much!). I glued the rim of the glass, but you would probably glue the base too. Once you have the glass glued, place it against the bottom of the plate and press firmly for 30 seconds. I put a couple big cans of tomatoes on mine to keep the pressure consistent.
Voila!
Materials:
– Thrift store plates and glasses. Candlesticks and votive holders will work too if you need some more lift: 79$ to $1.29 per piece
–Super Glue: $5
You can make a stand for under $10.
Variations:
Use china or porcelain plates for another look. Or, buy some matte white spraypaint and give your pedestal a coating to mimic milk glass!
Friday, July 1, 2011
DIY Whoopie Pie/Cupcake Stand


Wednesday, June 29, 2011
A TRUE budget wedding.
For those of you who REALLY want a budget wedding, I bring you this.
AutoWed Wedding Vending Machine by Concept Shed from Conceptshed on Vimeo.
Sunday, June 19, 2011
Dressing up a jam jar
Maine For our favors, we're giving guests a little jar of homemade blueberry jam--a local treat! I'm having them made and canned into small jars, but wanted to dress them up to match the other things we have going on at the reception.
I topped the lid with mini gingham fabric (a smaller version of our napkins on the table) and finished the edges off with pinking shears. A dab of glue on the top makes them MUCH easier to tie the blue hemp raffia around the lid.
To finish it off, I designed a label and a special gift tag with a message on the back for our guests. I can't wait to see them full and lined up for our guests!
Saturday, May 28, 2011
My wedding band
A month or so ago, we started our quest for wedding bands. I did some online searching, but did not come across anything that struck me. We decided to head into the city to see what there was in store. We found a beautiful wedding band that we both really loved. Not only did it pair nicely with my engagement ring, but it really complimented my grandmother's ring that I sometimes wear on my right hand. The only problem was that it was way more than we wanted to spend. While I love diamonds and sparkle like most any girl, I am a bit frugal and can not imagine dropping that kind of cash.
Here is the ring we fell in love with, or at least I did! :)
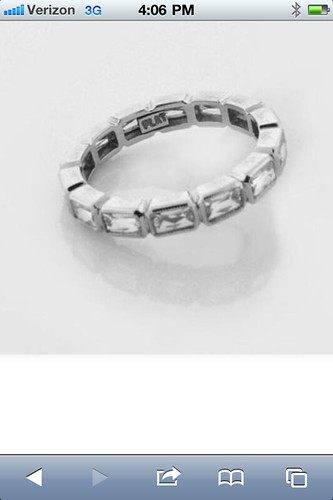
After some more looking, I just could not get that ring out of my head. The style was just what I was looking for, so we decided to make my band. Dave had my engagement ring made at the San Francisco Diamond Exchange, so it was only fitting that we go there to make my band. Not to mention the staff is super friendly and very helpful, which made the entire experience that much better.
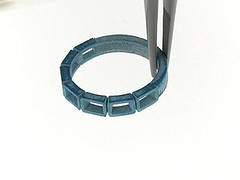
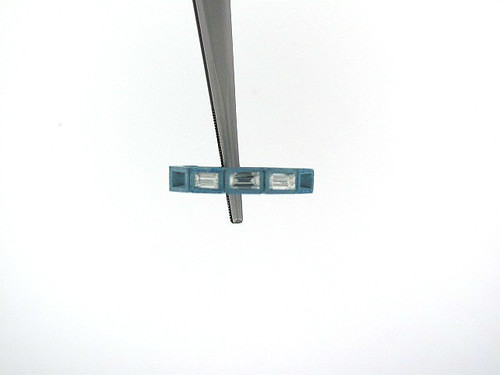
We set up an appointment to go over the ring design and check out the stones, this is something that my fiance really enjoyed when he shopped for my engagement ring. The original band was an infinity ring with mill grain detail, but I wanted something with fewer diamonds and a clean bezel. We were thrilled to learn that in a week we could see a mold of the ring.
Here it is! Dave went in to select the stones and assign their placement, I can't wait to see the real thing in a few short weeks. Too bad I have to wait for September to wear it!
Monday, May 16, 2011
Guest book ideas
Before I stumbled across my mailbox at a flea market, I was on a search for different guest book ideas for our wedding. My goal for this blog (other than to update it WAY more often) is to fill it with ideas that I find along the way. I have not been the best lately at putting thoughts down on my blog, but if you "like me" on Facebook--you should be getting some pretty regular inspiration.
Anyway, back to the guestbooks. Here are some ideas that I found really useful. My big thing was that I didn't care to have a book of signatures that I'll never look at again. What's more important to me is something that will do two things: entertain my guests and give me some sort of a keepsake.
Guest book ideas
1. Have your guests sign an oversized letter of your new last name. Not taking his name? That's okay--use an ampersand!
via Style Me Pretty
2. I absolutely love this! Create a wedding style Mad Lib and have your guests fill out their own for you to laugh at later.
via The Knot
3. We really liked this idea, but since we are having a destination wedding--the idea of lugging a suitcase of rocks home was not an option. Have your guests sign small rocks and put them into a large glass hurricane. Store them there, or scatter them in your garden!
via the Knot
4. Because we're doing stumps as our centerpieces, I loved the idea of spreading out that theme to our guestbook. This "guest log" on etsy is really cute!
5. Doing a lovebird theme? Have your guests leave their thumbprint to make a tree. Use inks of your wedding colors! You can buy the one below here.
6. Want to DIY without having to completely do it all yourself? This one from Martha Stewart is great. It's similar to a traditional guestbook, but with enough design flair to make you want to hang it up. Best of all, you can download the template and customize it yourself.
7. Put a vintage typewriter out on your guest table with some extra paper and have your guests type messages up for you. There's tons on ebay. or maybe you're fortunate to have one if your own. When it's all said and done, you can scan the pages to put into your wedding album.
8. If all else fails, there's always the "signing of the mat." Pick out one of your favorite photos or save it for a wedding picture and have your guests sign all around it. I created a large version of my event poster for one of my bride's and she used that (Thanks Michelle for sending me this photo!). Any of my invites can be resized for applications like this!
Monday, April 25, 2011
Our mailbox guestbook is complete!
Remember the mailbox I found at a flea market in San Francisco last weekend?
Well, with a very small amount of elbow grease and a can of spray paint, it has transformed into something so cute, that I can hardly even stand it.
If you didn't click on the link above, I must show you what it looked like before. I mean seriously--I can't believe what a difference a can of spray paint makes.
I'm making an insert for the bottom with our new married name and am having cards printed for our guests to fill out and drop into our mail slot.
Our goal is for them to have fun answering the pre-printed questions. We can't wait to read them all on our long flight from the east coast back to the west coast!
My fiance had the great idea of attaching the mailbox to a wood stump to carry on the theme from our centerpieces. It's great that he is involved in our wedding plans, we're both so excited to see how it all turns out.
Monday, April 18, 2011
Flea Market Find!
I was so excited to stumble across this vintage mailbox at the Candlestick Park Flea Market this past weekend. After some quick haggling, it was mine!
I am going to clean it up and put a coat of red spray paint on it to sit on one of our entry tables. I am not quite sure what I will do for an actual guest book, or if we will even do one for that matter--but I plan on making good use of this mailbox by creating some small cards for our guests to write us messages.
And who knows, perhaps we'll even get to stick it on the front of our house one day. I've always wanted a red mailbox!


